 Customer Booking Page | Publish
Existing stores can upgrade to the new CBP (Customer Booking Page)The Customer Booking Page (CBP) is BRM’s new platform for customers to make online bookings. It offers a more modern booking experience and includes many more features than the Online Booking Wizard (OBW).
If you are an existing BRM store using OBW, you can migrate to the new CBP by following the steps below.
To get started, go to:
Settings > Customer Booking (Online) > CBP Publish
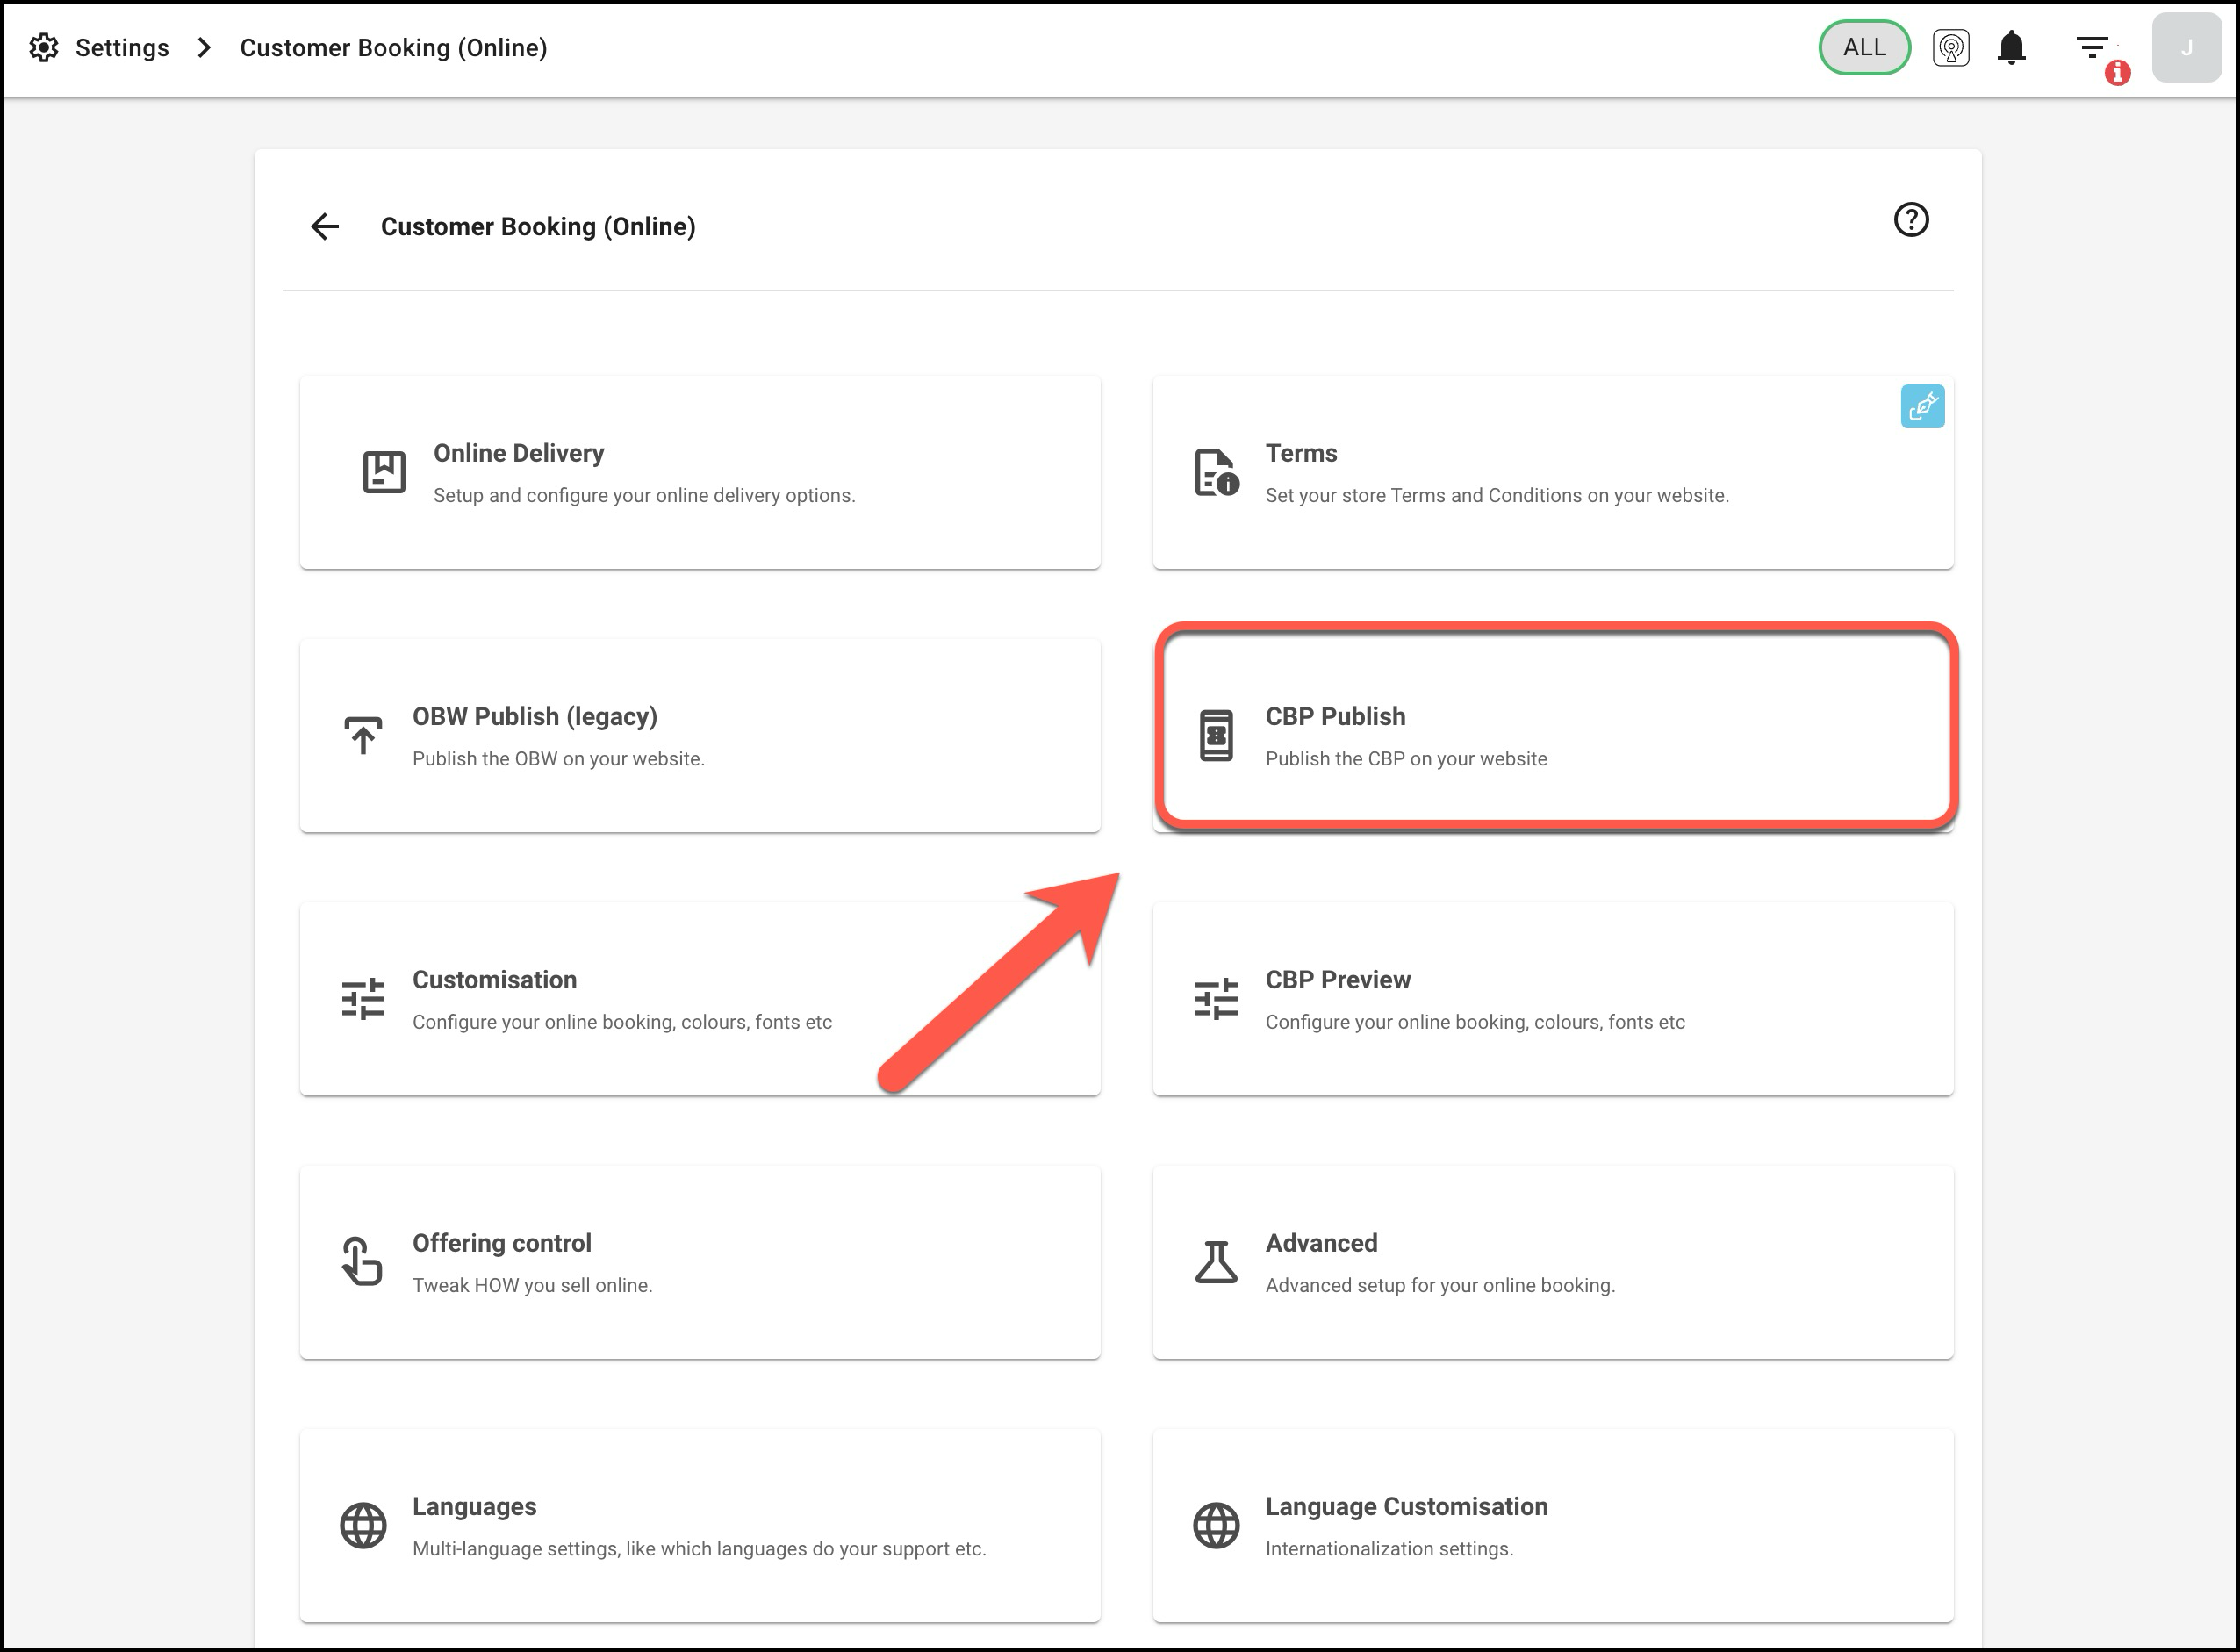
When you visit that page you will see something like the following:
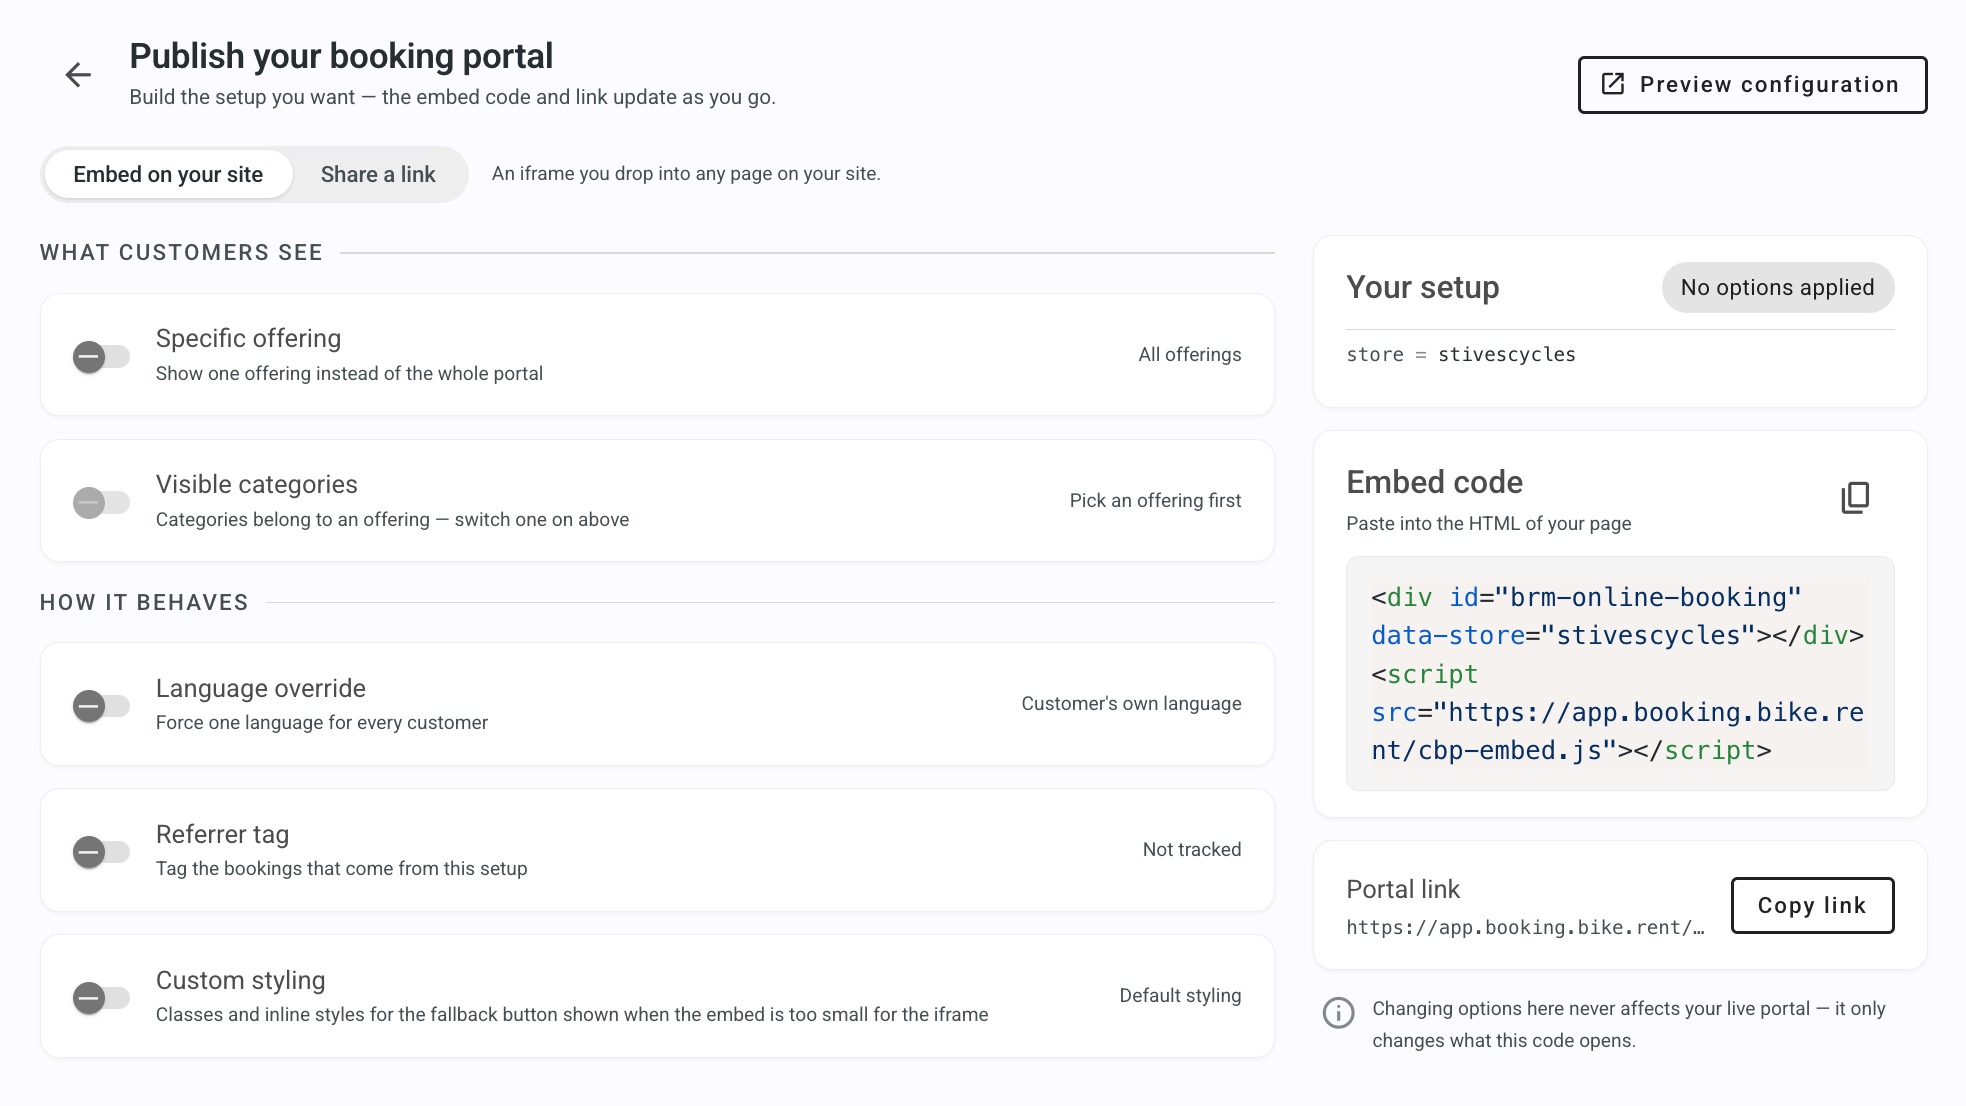
The CBP Publish page gives you everything you need to publish your new booking page.
You can:
- Create a separate booking link for each service offering
- Choose between an embedded booking page or a standalone link
- Set a language override
- Customise the appearance using Advanced Custom Styling
And it provides two ways to publish your CBP:
Embedded form (iFrame embed on your website)
External link (standalone booking page)
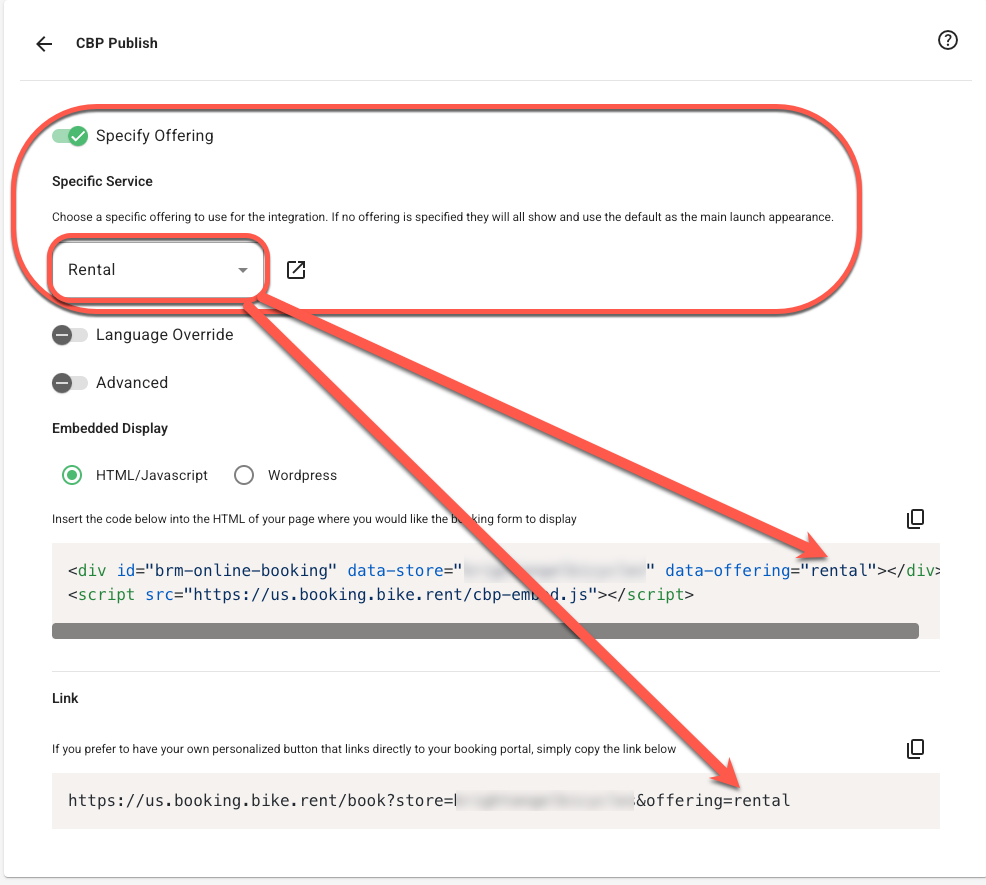
1. Create a booking page for each service offering
If you offer different services, such as Rentals, Tours, Activities or Repairs, you can create a unique CBP link for each one.
For every service offering, BRM provides two options:
Embedded: Add the booking page directly to your website using an iFrame.
Standalone: Use a direct link that opens the booking page in a new browser tab.
This allows you to create separate Book Now buttons or pages for different parts of your business.
2. Choose your language
Use Language Override if you want your CBP to appear in a specific language, regardless of the visitor’s browser language.
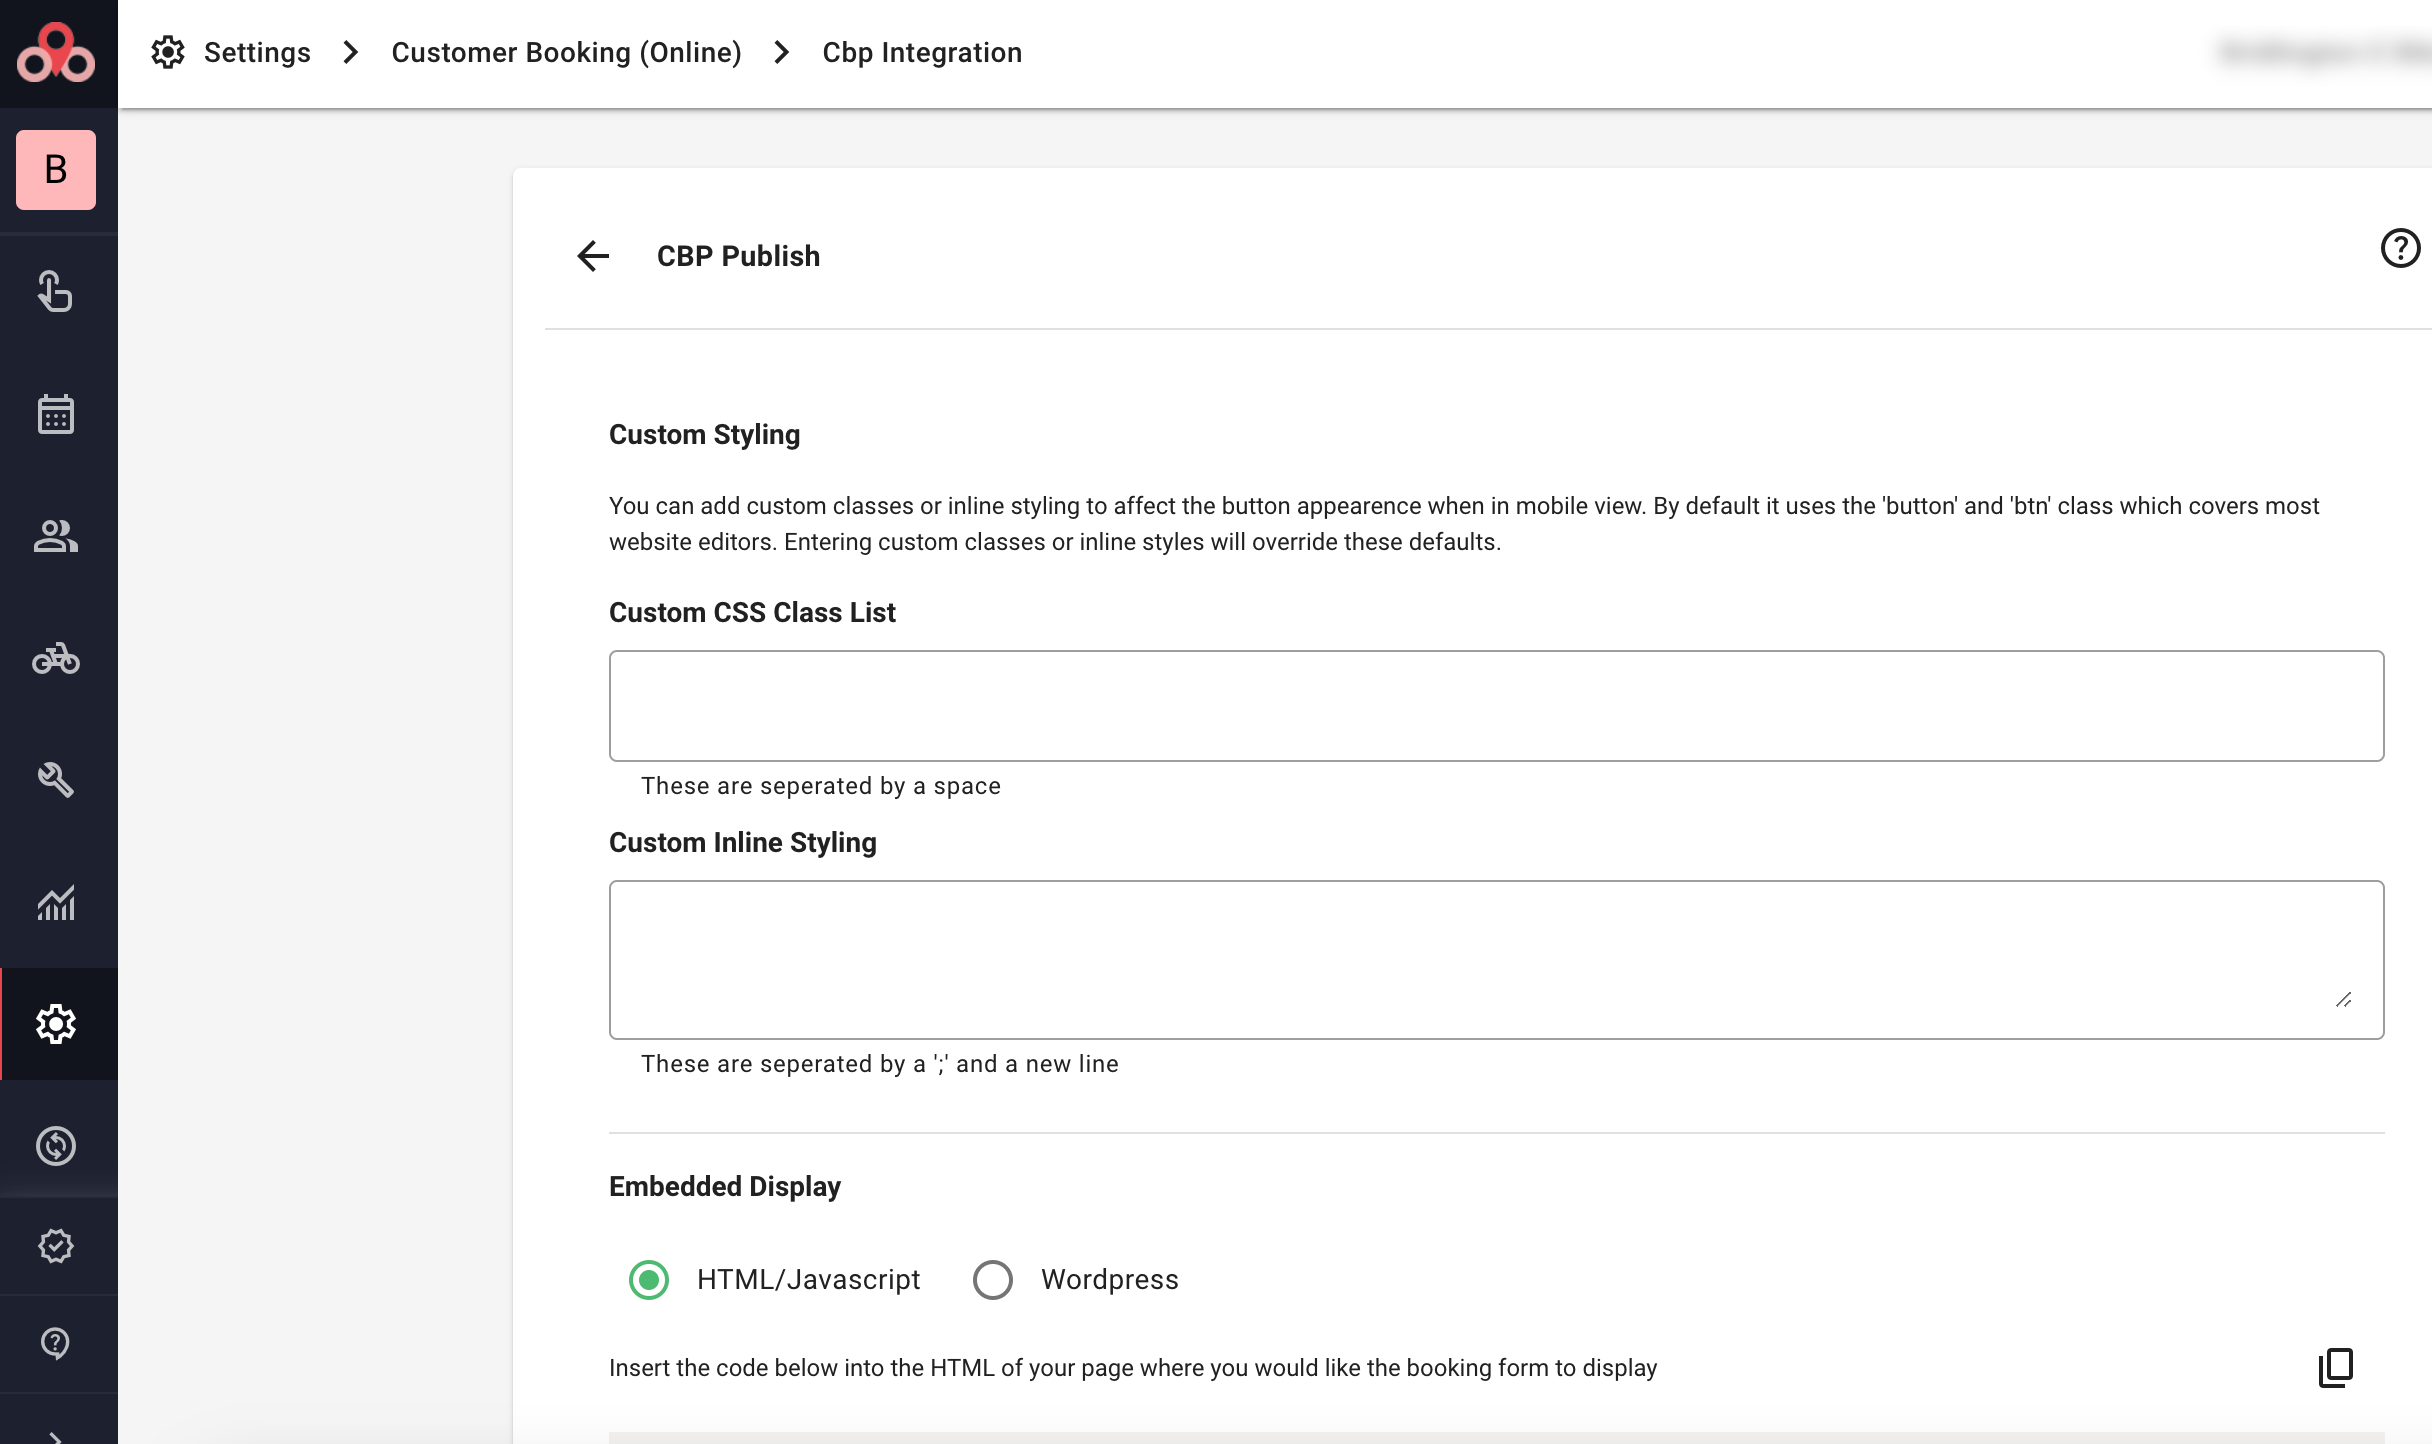
3. Customise the appearance
Use Advanced (Custom Styling) to adjust the appearance of your CBP so that it fits better with your website.
For example, you can customise how the Book Now button looks on mobile.
How does it look for your customers?
CBP is responsive and adapts based on the space available where you embed it.
Here is an example of how it looks on mobile—buttons may move down towards the bottom of the screen.
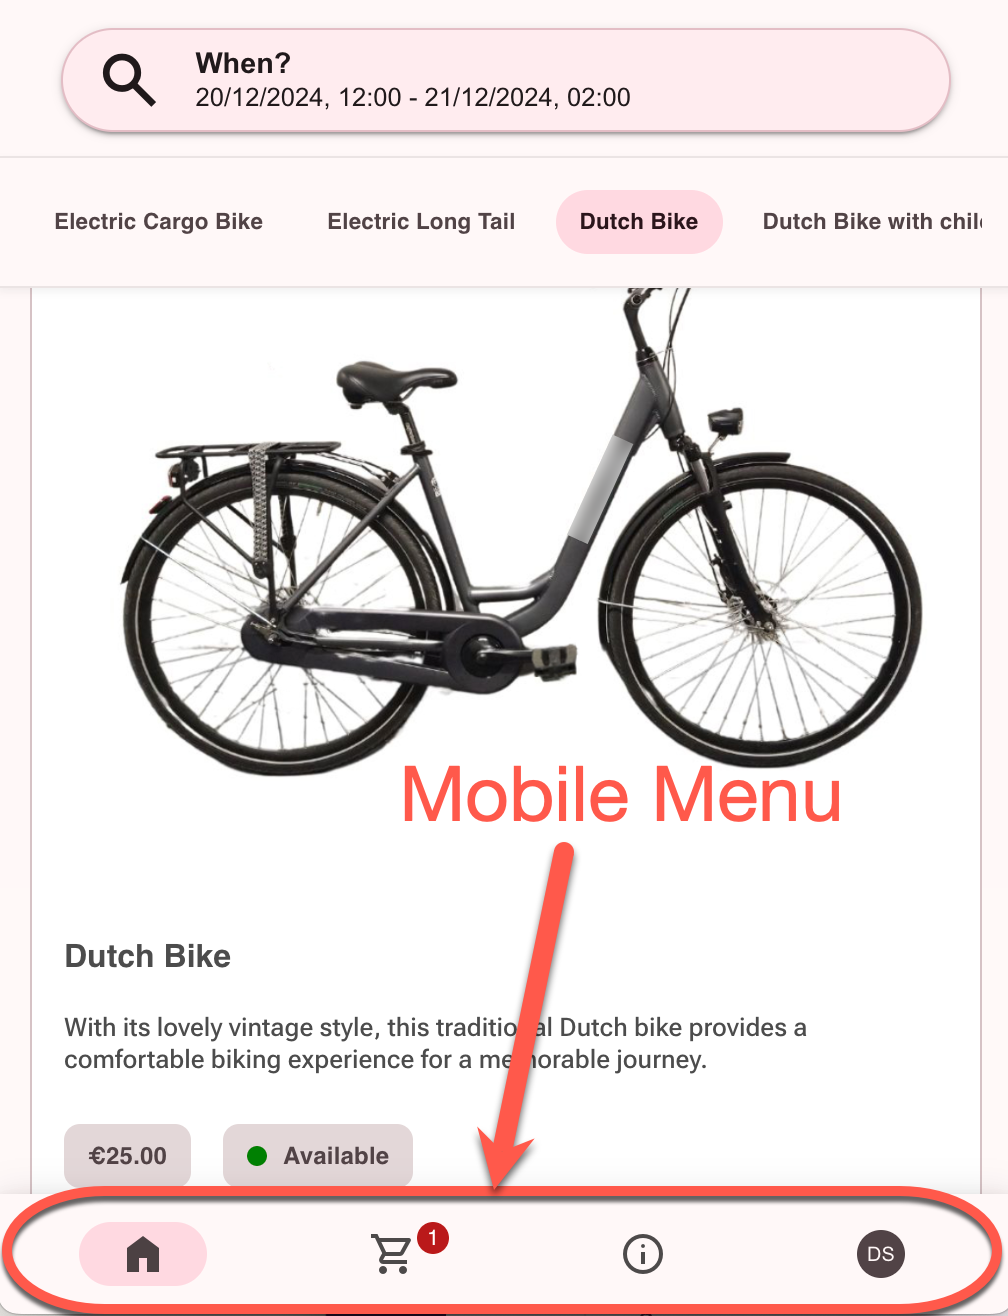
Important: Embedded view vs Button view
CBP switches between two views: the full embedded booking widget (an iframe), or a Book Now button that opens the full booking flow in a new browser tab. Which one your visitors see depends on their screen size — the rule is different on phones/tablets vs desktop.
On phones and tablets (browser width 768px or narrower)
CBP always shows the Book Now button here, no matter how large or tall you make the embed area. This is intentional, not a sizing problem: the full CBP app needs more room to work properly than a phone or tablet screen can give an embedded frame, so mobile and tablet visitors always get the button and complete their booking in a full-screen tab instead. There is nothing to configure on your website to change this for these visitors — resizing or restyling the embed block will not switch them to the embedded view. (You can restyle the button itself using Advanced (custom styling) on the CBP Publish page — see above — but it will still be a button.)
On desktop (browser width above 768px)
Here, CBP checks the size of the iframe viewport (the visible area of the embedded frame) and shows the button instead of the embedded widget if:
the iframe viewport width is below 370px, OR
the iframe viewport height is below 500px
This is expected behaviour on desktop and usually means the embed area is too narrow (common in two-column layouts) or too short (fixed-height sections).
Tip: If you want the full embedded booking experience on desktop, make sure your embed area is wide enough and tall enough (generally: full-width section and at least 500px height, often more). Note this only affects desktop — it will not change what phone or tablet visitors see.
Publishing in embedded form (iFrame)
You will want to copy the HTML code (specific to your store) and paste it into your website as an iFrame.
Please note: When you paste the code into your website, make sure you paste it as CODE (raw HTML), not plain text.
Platform examples (WordPress, Shopify, Wix, Squarespace)
WordPress
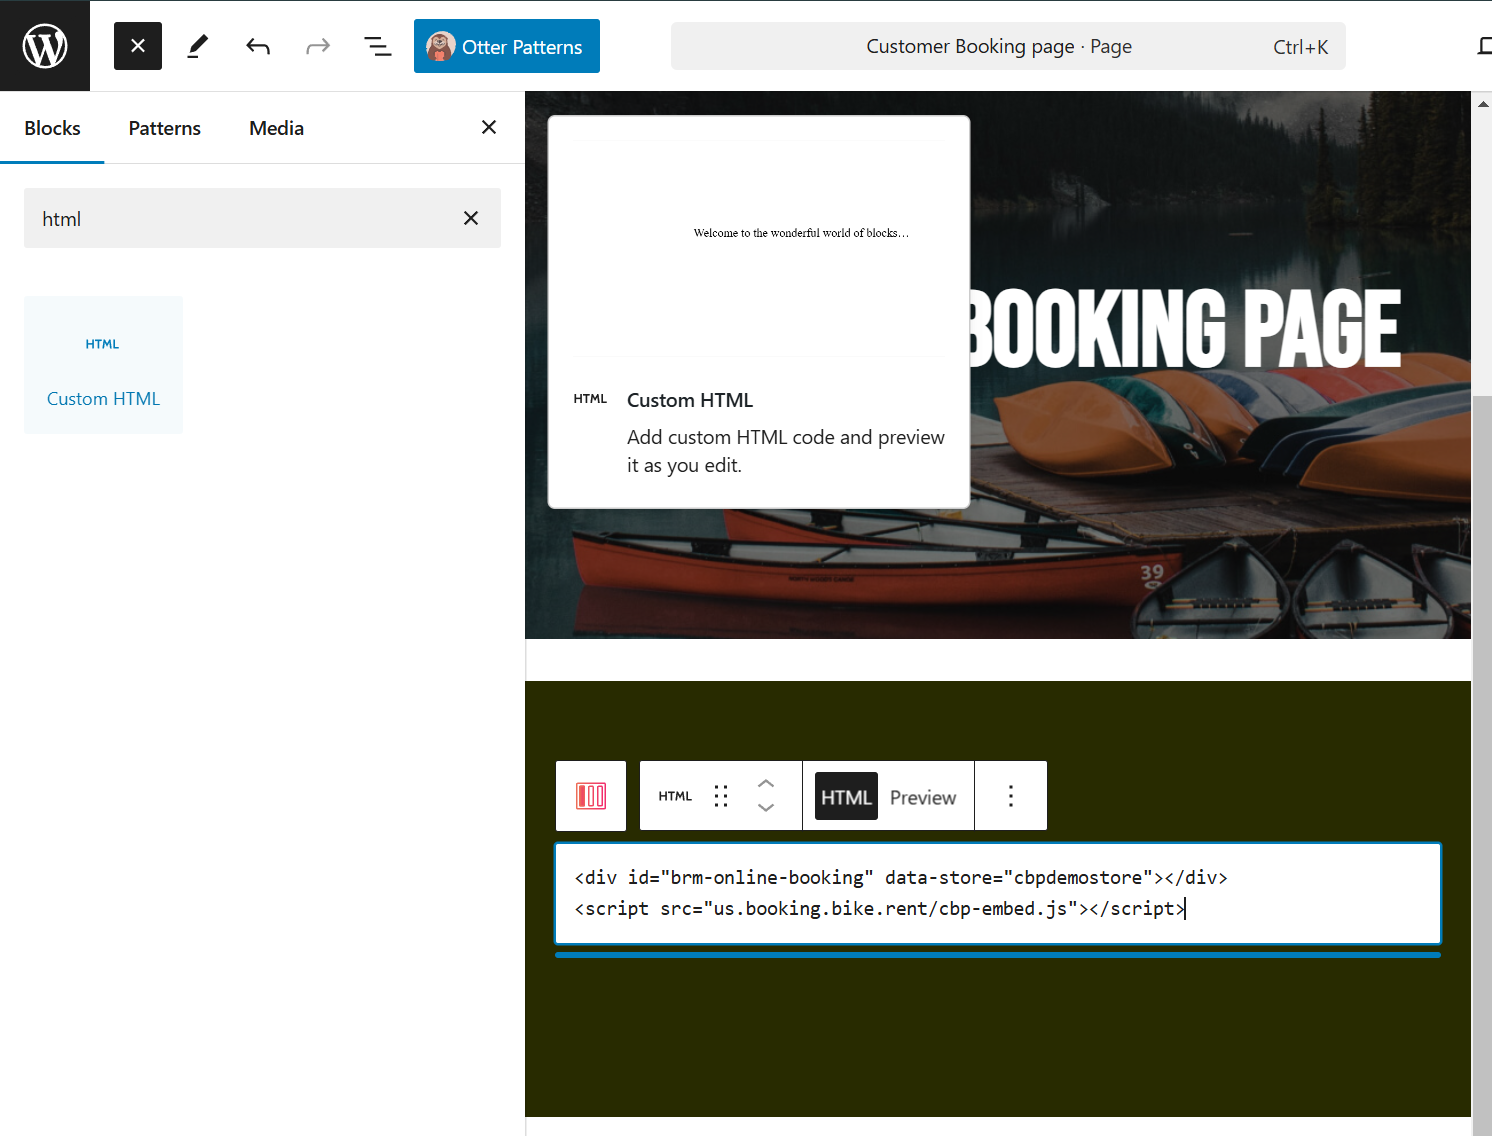
Here is an example of pasting it into a WordPress site:
Paste the snippet into a block/section that supports Custom HTML or Code.
Shopify
Here is an example on a Shopify website:
Make sure you enable the code view button as shown in the editor, then paste the snippet.

Wix
Here is an example on a Wix website:
Make sure you embed it as HTML code (not text) using Wix’s embed HTML element.

Squarespace
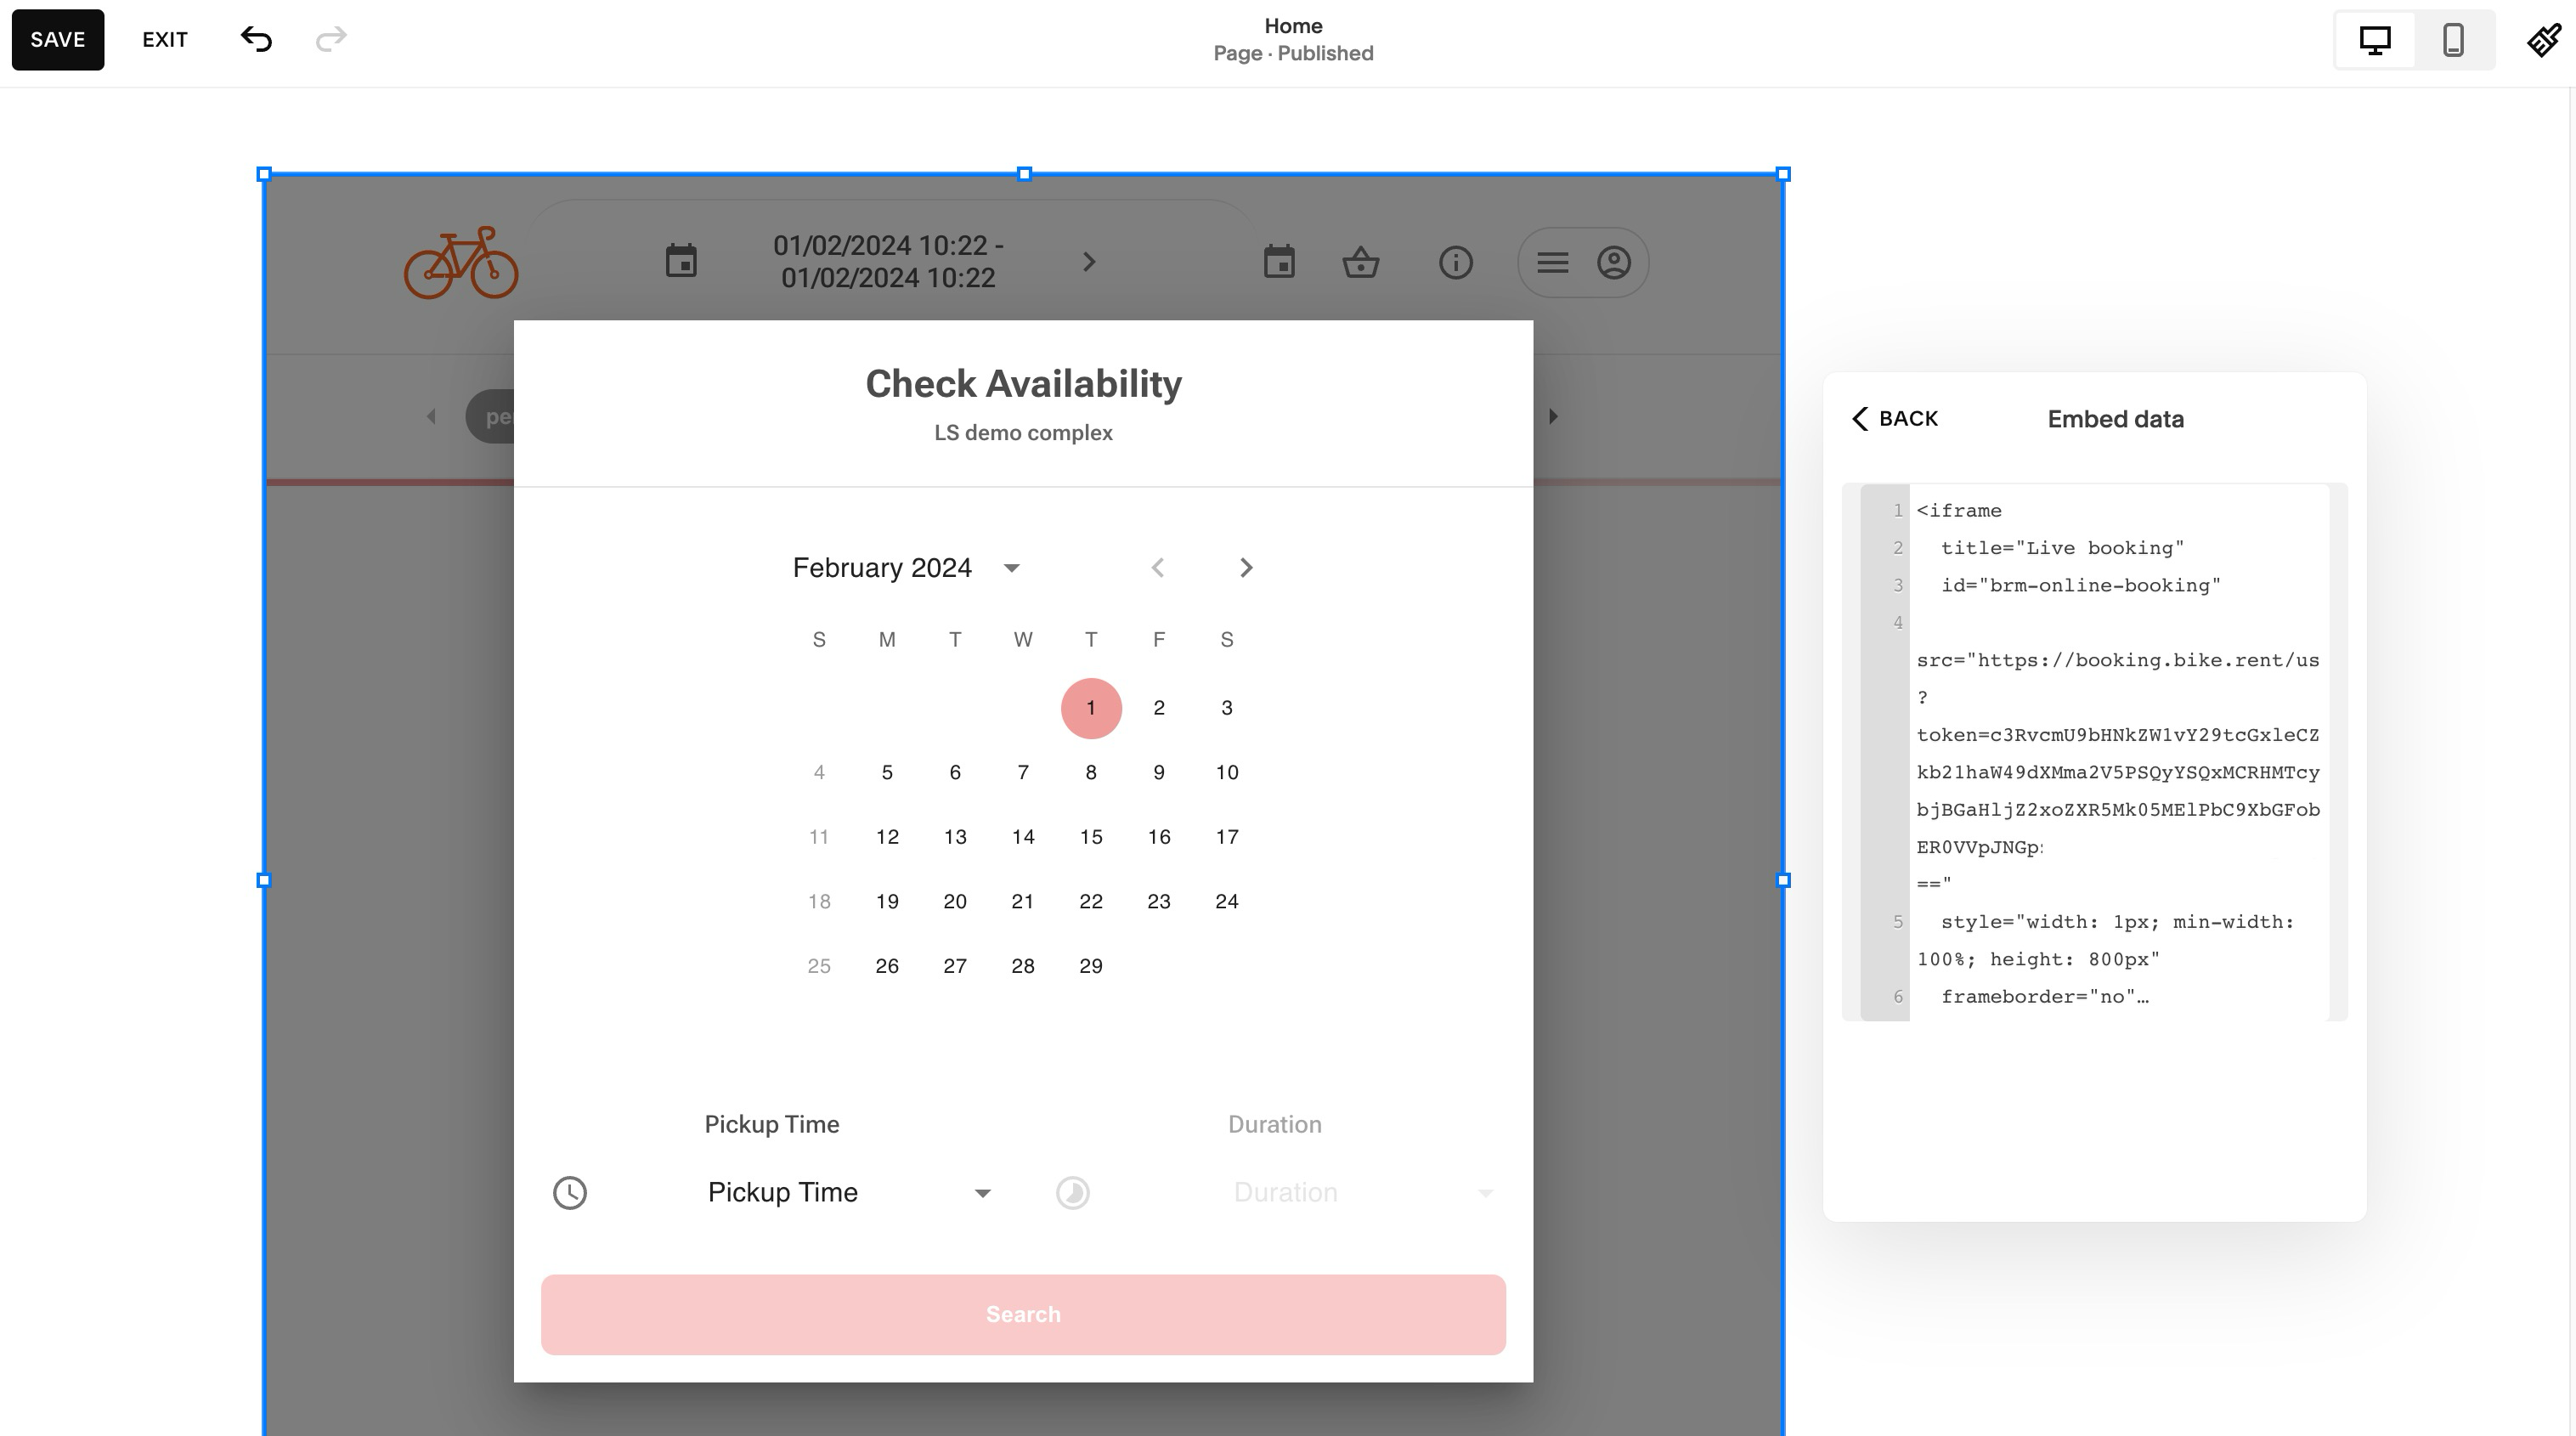
Here is an example on a Squarespace website:
Make sure you use an Embed Block and copy your HTML code inside, as explained in the help article: https://support.squarespace.com/hc/en-us/articles/206543617-Embed-Blocks
Don’t see your particular platform?
Don’t worry! The process is the same everywhere:
Use the Copy code button in BRM on the CBP Publish page
Paste the snippet into your website in a section that accepts raw HTML / code
On desktop, confirm your embed area is large enough (otherwise CBP may display as a button due to the 370px/500px thresholds). On phone and tablet screens (768px wide or narrower), CBP always shows the button regardless of embed size — that’s expected, see Embedded view vs Button view above
If you have trouble, please contact our support team and we’ll be happy to help!
See Al
Deep Link to a Specific Category
Was this article helpful?
That’s Great!
Thank you for your feedback
Sorry! We couldn't be helpful
Thank you for your feedback
Feedback sent
We appreciate your effort and will try to fix the article